Your First Topology
This walkthrough takes you from a freshly-running Topolograph to your first analyzed graph using the simplest input: a text file copied from one router.
You'll need
- A running Topolograph instance (install with Docker).
- Access to one router in the OSPF or IS-IS area you want to map.
1. Grab the LSDB from one device
Because the whole area shares one database, you only need to collect it from a single router. Pick the command for your platform — the full matrix is on the Supported Vendors page. For example:
Save the output to a plain text file. You can paste the LSA 1 / 2 / 5 sections into one file.
Richer links (optional)
For FRRouting OSPF, append the output of
show ip ospf database opaque-area to the same file to pull in bandwidth,
TE metric and admin-group data. This is optional — the graph still builds
from LSA 1/2/5 alone. See Traffic Engineering.
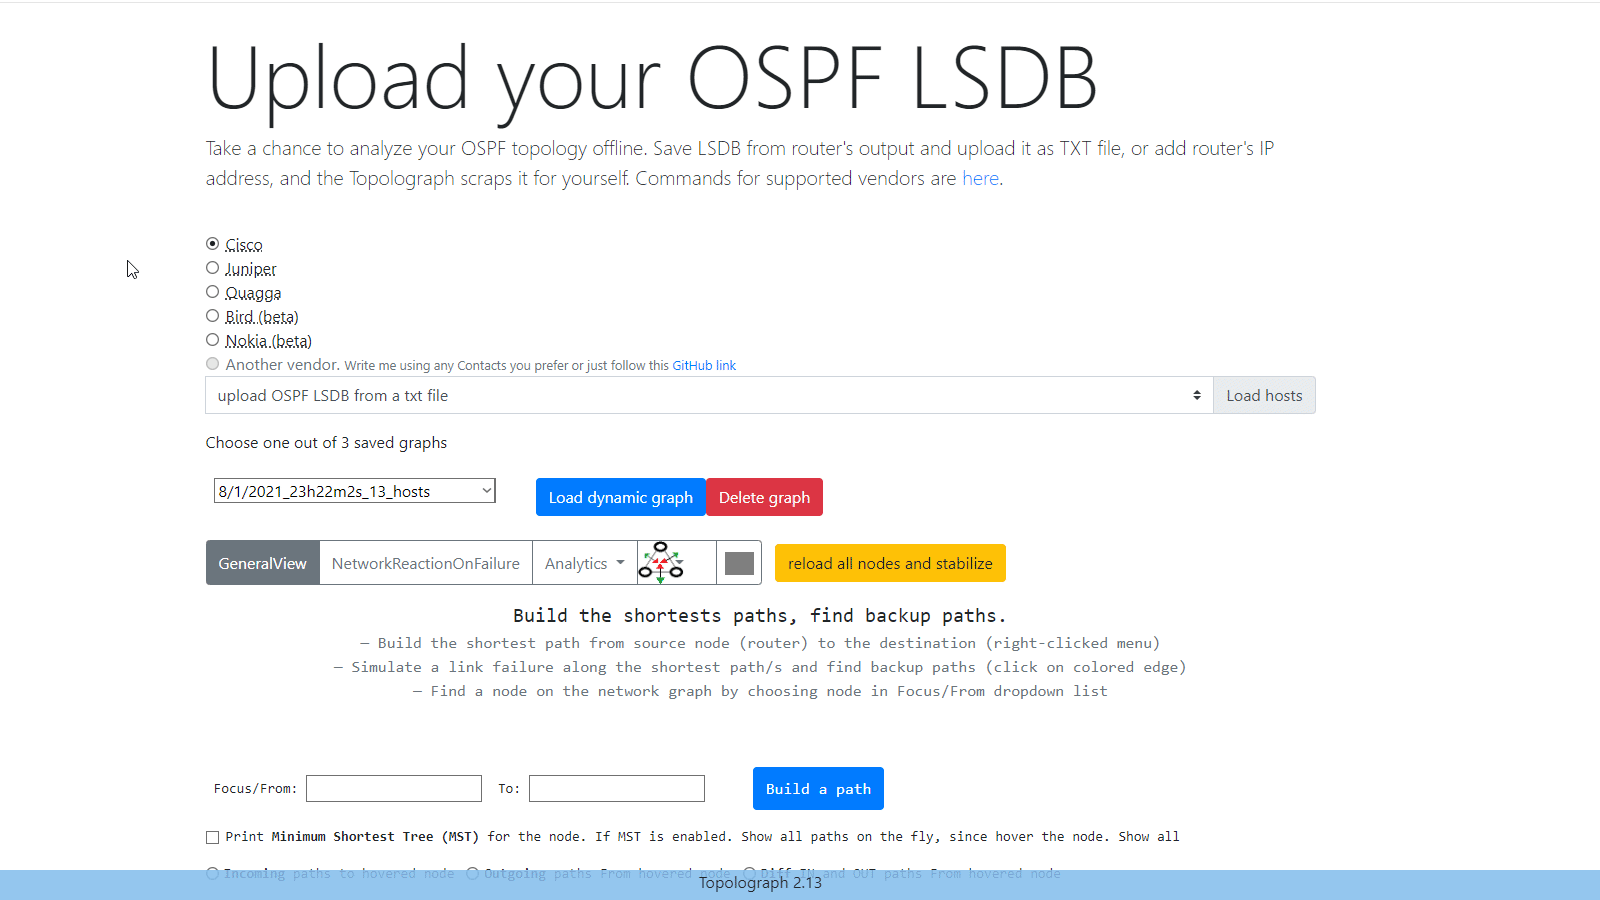
2. Upload it
- Open Topolograph at
http://localhost:8080/. - Choose to upload a topology and paste (or upload) your text file.
- Pick the vendor and protocol that match your capture.
- Submit — Topolograph parses the LSDB and renders the graph.
The result is a snapshot: a frozen picture of the network state at the moment you captured the database. Every analysis you run happens against this snapshot, so nothing you do here can affect the live network.
3. Build a shortest path
With the graph on screen, pick a source and destination node and build the shortest path between them. Topolograph highlights the path and shows its total cost.
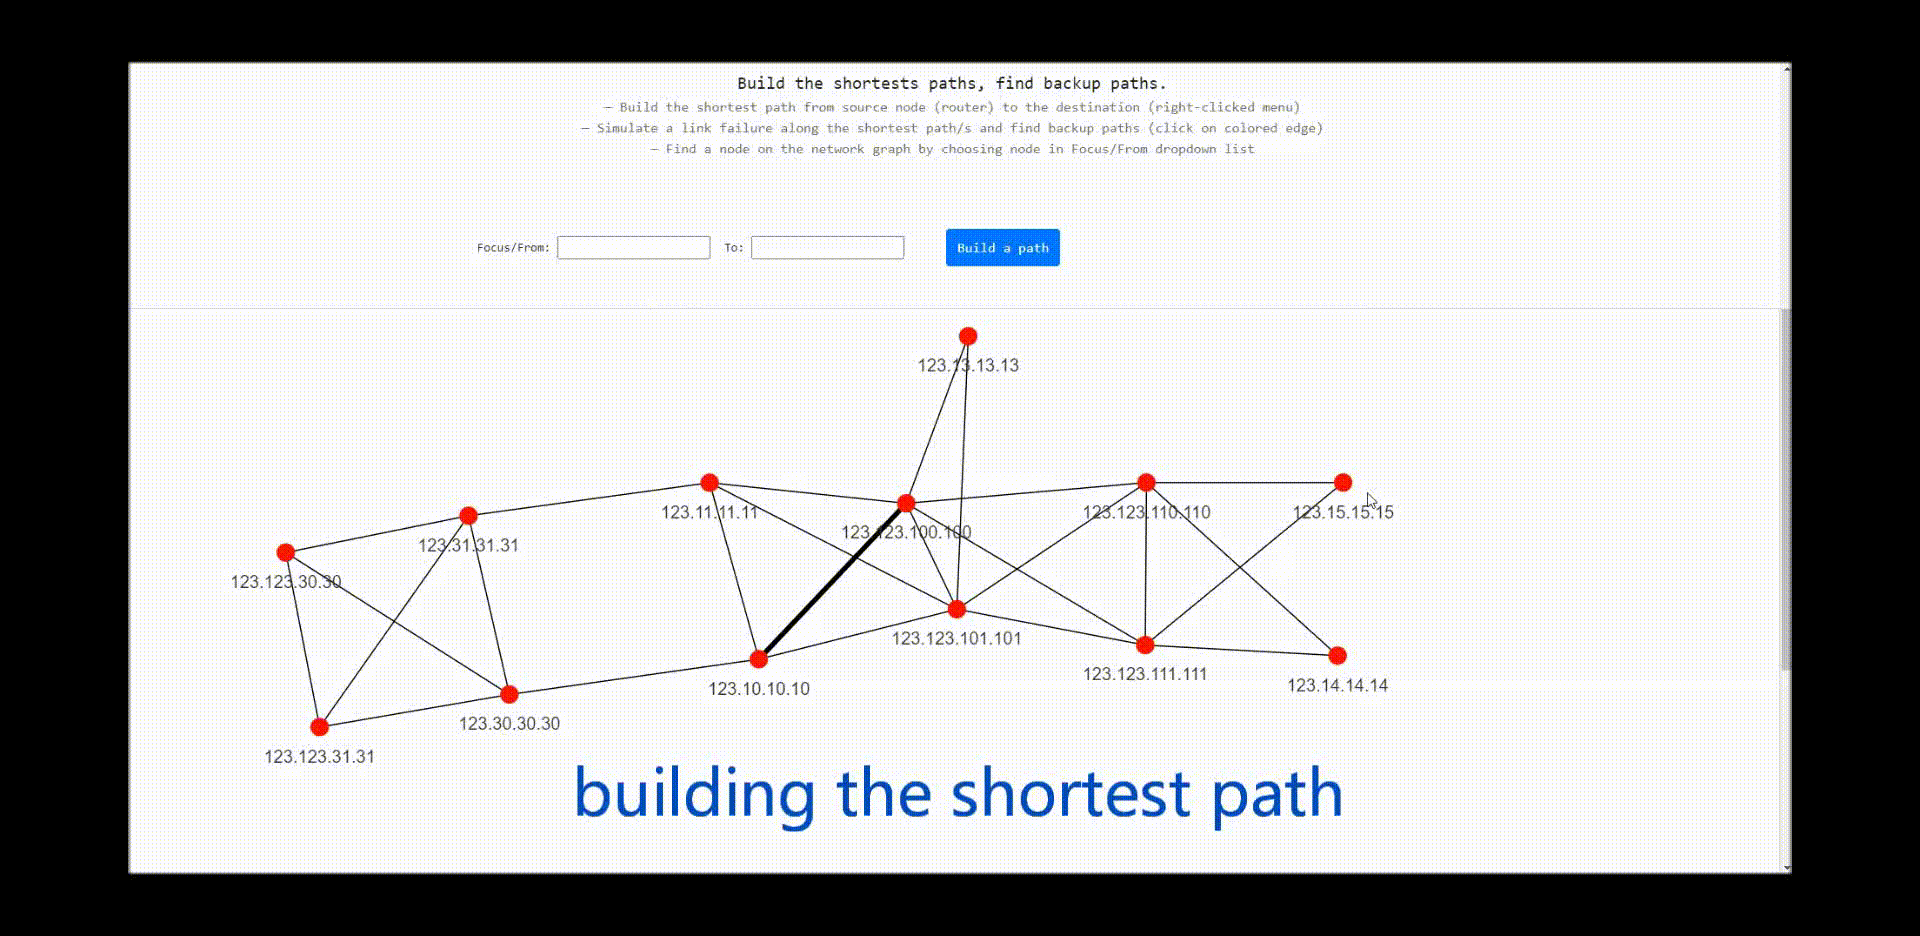
From here you can immediately:
- Reveal the backup path the network would use if the primary failed.
- Shut a link or node and watch traffic re-route.
- Open the Network Heatmap to find your busiest and least-protected links.
All of these are covered in Analysis & Visualization.
4. Where to go next
-
Stream it live
Tired of copy-pasting? Have a Watcher feed topology automatically over GRE or BGP-LS.
-
Go deeper on analysis
Backup paths, ECMP, failure simulation, cost planning, and the heatmap.
-
Monitor continuously
Capture every adjacency and cost change and ship it to ELK, Zabbix or Slack.
-
Automate it
Collect and upload LSDBs with the
topoCLI and Python SDK.